Cinderella Doll Dress Cake Tutorial
Disclosure: This post may contain affiliate links.If you make a purchase through links on our site, we may earn a commission.
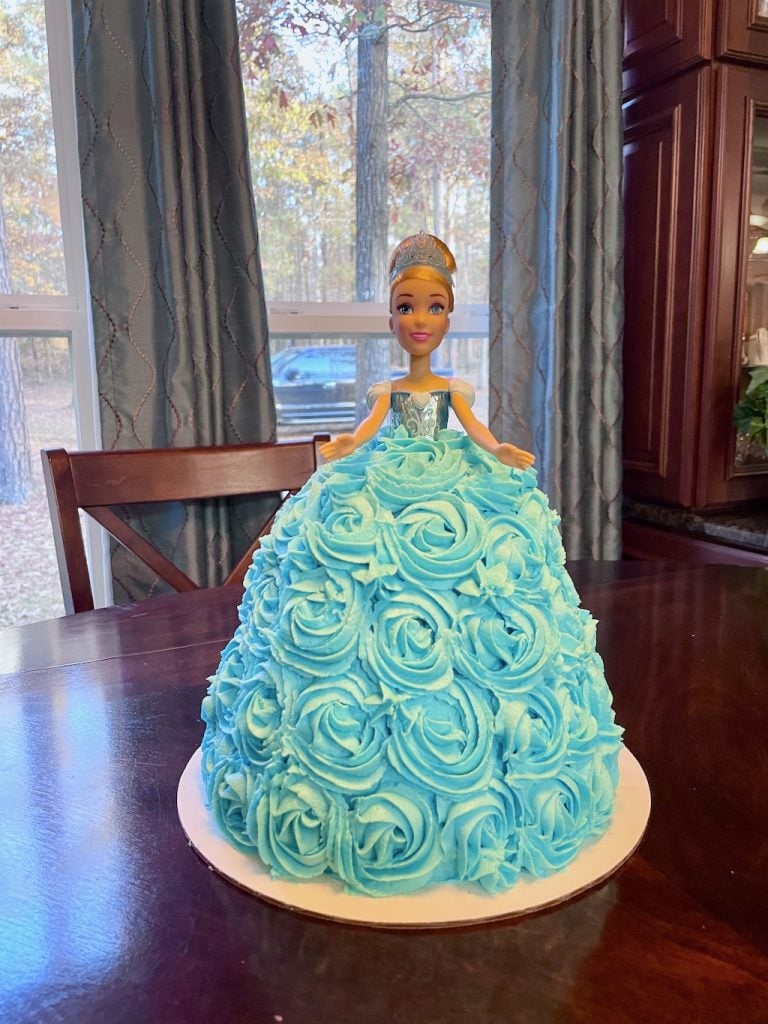
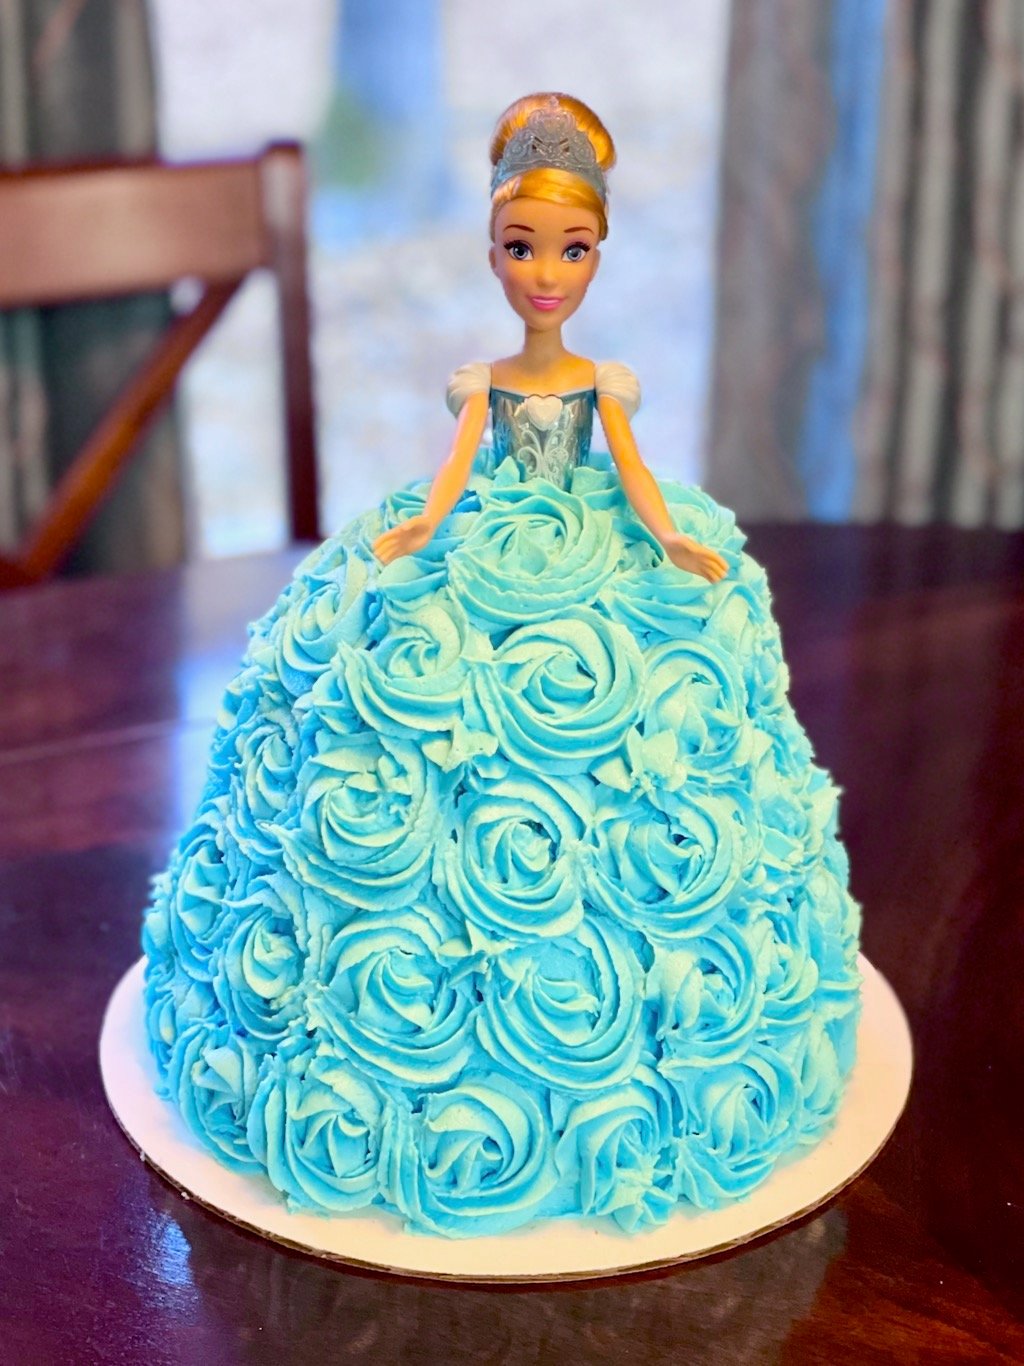
How to make a Cinderella Doll Dress Cake. How pretty is this Cinderella Doll Dress Cake? This 5-layer vanilla doll dress cake with buttercream frosting is much easier to make than you may think. We are sharing all the details on how to make this cake for your little girl.
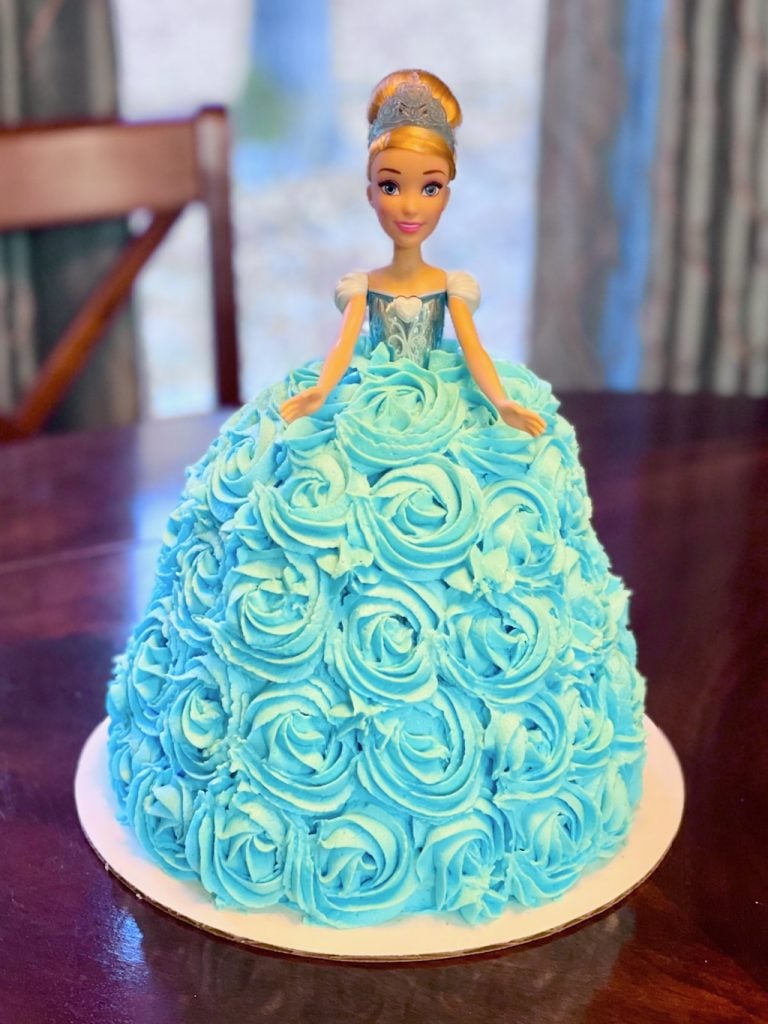
We made this Cinderella cake for my niece’s 4th birthday party and it was a big hit!
She loved to see Cinderella on her cake.
Her first question was “Can I take Cinderella out and play with her?”
Lucky for her, the doll is in perfect condition and she got to play with it immediately after her party.
She was so happy and excited about this cake. I bet your little girl would love it too.
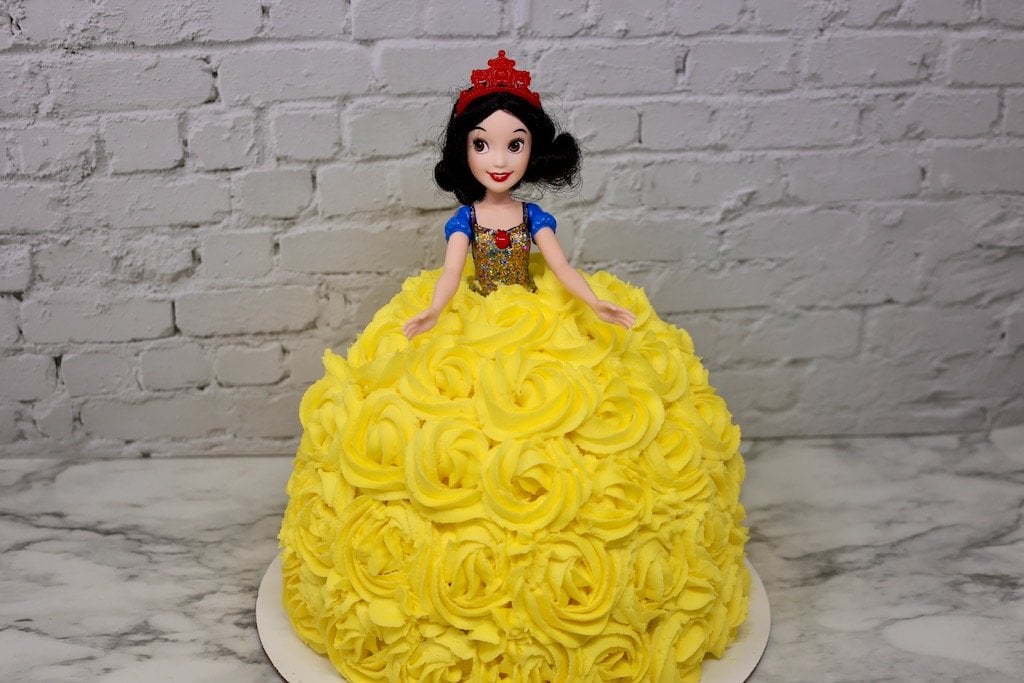
If your little princess is more into Snow White, we have a Snow White Doll Dress Cake too!
Table of contents
- Why I Love This Recipe
- Ingredients & Substitutions
- 🌟 Step #1 – Bake Three Boxes of Cake Mix
- 🌟 Step #2 – Level Four of the Cake Layers
- 🌟 Step #3 – Make the Blue Buttercream Frosting
- 🌟 Step #4 – Stack Five Layers with Frosting in Between
- 🌟 Step #5 – Put the Doll in the Middle of the Cake
- 🌟 Step #6 – Shape the Cake Layers into a Bell
- 🌟 Step #7 – Apply a Crumb Coat then Chill
- 🌟 Step #8 – Pipe Blue Rosettes for the Cinderella Dress
- Handpicked Recipe Favorites From My Kitchen, Just For You!
- Frequently Asked Questions
Why I Love This Recipe
This recipe is incredibly special to me because it combines creativity with deliciousness!
Every layer is filled with fluffy texture and rich vanilla flavor, which makes it a hit among kids and adults alike.
Plus, the decoration is so much fun!
Watching the little ones’ eyes light up when they see their favorite princess come to life in cake form is priceless.
Ingredients & Substitutions
Before you jump into your baking adventure, here’s what you need to create this show-stopping cake:
- White cake mix: This is the base of your cake. I love to use boxed mixes for convenience, but you can make your own from scratch if you prefer.
- Eggs: They add moisture and richness to each layer. For a dairy-free option, consider using flaxseed meal mixed with water as a substitute.
- Vegetable oil: This keeps the cake moist. Canola or coconut oil is a great alternative.
- Vanilla buttercream frosting: The star of the show! Cream cheese frosting would be another delicious choice if you’re looking for a tangy twist.
- Gel food coloring: This gives you that stunning sky blue color. Feel free to experiment with other colors to match your theme!
🌟 Step #1 – Bake Three Boxes of Cake Mix
Our pretty Cinderella cake boasts 5 cake layers that are 8 inches in diameter.
Since we need 5 cake layers and a box of cake mix makes two 8-inch cakes, we will need to bake 3 boxes of cake mix.
We will end up with 6 total cake layers, but it’s better to have too many than too few.
Five layers of cake will be the perfect height for Cinderella’s dress.
Mix up each box of cake mix one at a time. Bake it in two 8-inch pans then let it cool enough to remove from the pans before moving to the next cake mix.
To prepare the pans, place a circle of parchment paper on the bottom and then grease the paper and the sides of the pan very well.
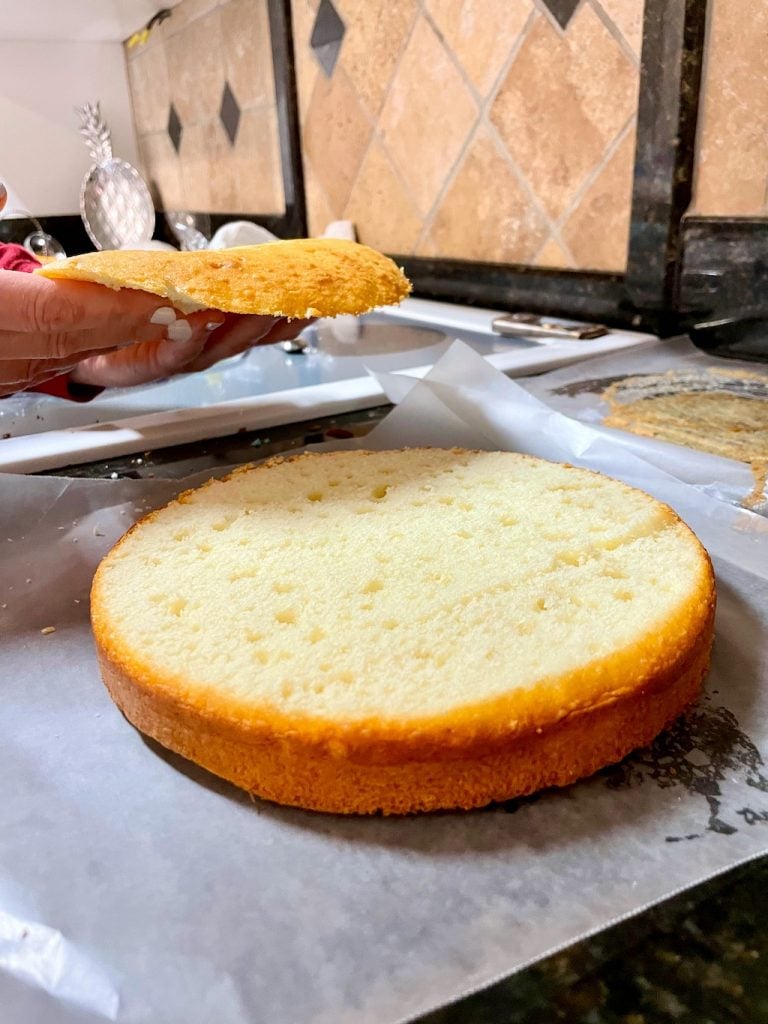
🌟 Step #2 – Level Four of the Cake Layers
Use a cake leveler or a sharp knife to level four of the cake layers.
You can pick up a cake leveler for just a few bucks and they make leveling cakes so easy.
If you struggle to get your cake layers even on both sides with a knife, a cake leveler is a great tool that makes the process foolproof.
You do not need to level the 5th cake layer that will go on the top.
Since we’re shaping the cake with a knife, the rounded top will benefit us as we shape the cake for Cinderella’s dress.
For the four layers that you are leveling, you are only removing the domed top so that they will stack up evenly without topping over.
You don’t need to cut them to a certain height, only remove the dome.
🌟 Step #3 – Make the Blue Buttercream Frosting
We’re using delicious buttercream frosting for this doll dress cake.
First, check out our Easy Vanilla Buttercream Frosting recipe.
I highly recommend using gel food coloring to tint the frosting a pretty Cinderella blue color.
For my Cinderella cake, I used Americolor gel food coloring in Sky Blue.
Since we’re using gel food coloring, you only need a few drops to get a pretty blue tint to your frosting.
And the gel food coloring won’t affect the quality and texture of your buttercream frosting like a liquid food coloring would do.
Mix in the gel food coloring after you have your frosting in a fluffy and smooth consistency.
Be sure to scrape down the sides of the bowl as you are mixing in the color to ensure that your frosting is a consistent blue color.
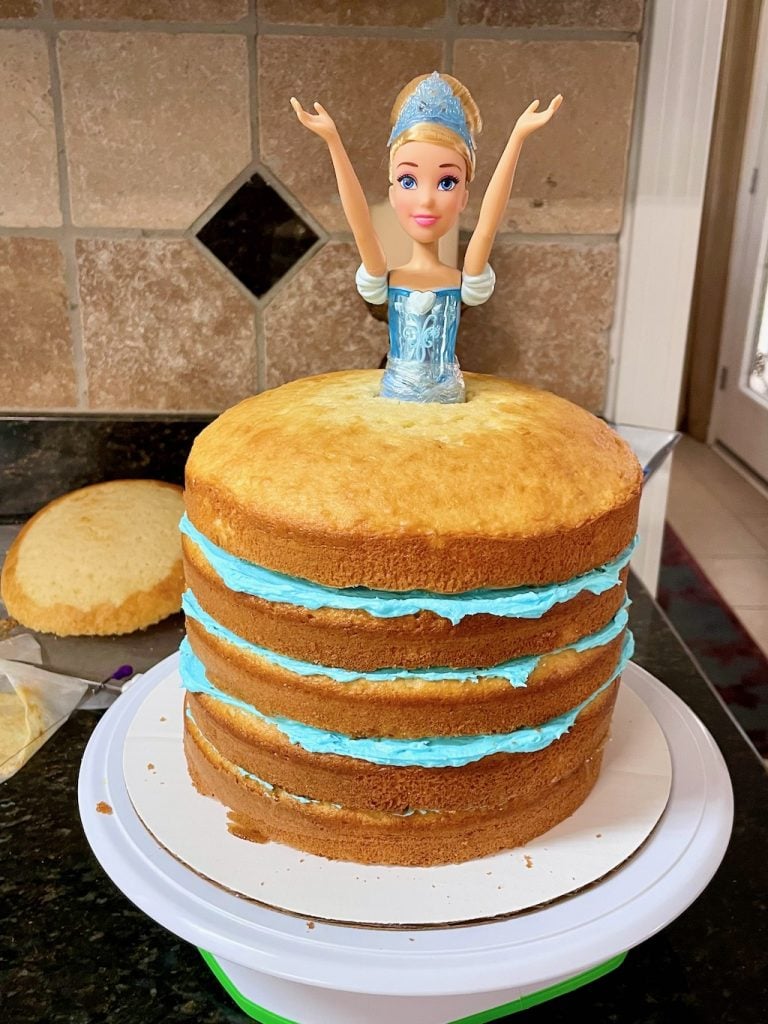
🌟 Step #4 – Stack Five Layers with Frosting in Between
When stacking the cake layers, start by smearing a bit of frosting on the cake board.
And for that matter, put down a round cake board so that you can easily transport the cake.
An 8-inch or 10-inch cake board would work fine for this project.
After your smear a little frosting on the board to make sure the cake doesn’t slide off, start stacking up the cake layers.
Add frosting that has been colored to match your cake in between the layers.
Use an offset spatula or a knife to spread the frosting to the edges of the cake layers.
Make sure the frosting is as even as possible so that the cake will be stable when it is fully assembled.
🌟 Step #5 – Put the Doll in the Middle of the Cake
For this Cinderella Princess cake, you will need a Cinderella doll that has an attached or painted on the bodice.
I found a Disney Princess Royal Shimmer Cinderella doll on Amazon for less than $10 and it was perfect for this Cinderella cake.
Use a piece of plastic wrap to cover the lower half of the doll.
You will want the plastic wrap to go up slightly higher than the doll’s waist just to protect the doll from the cake and frosting.
After the cake layers have been assembled with frosting in between them, gently press the doll into the center of the cake.
You do not need to poke a hole in the cake first. The cake is soft enough that the doll should go right into the cake without damaging it.
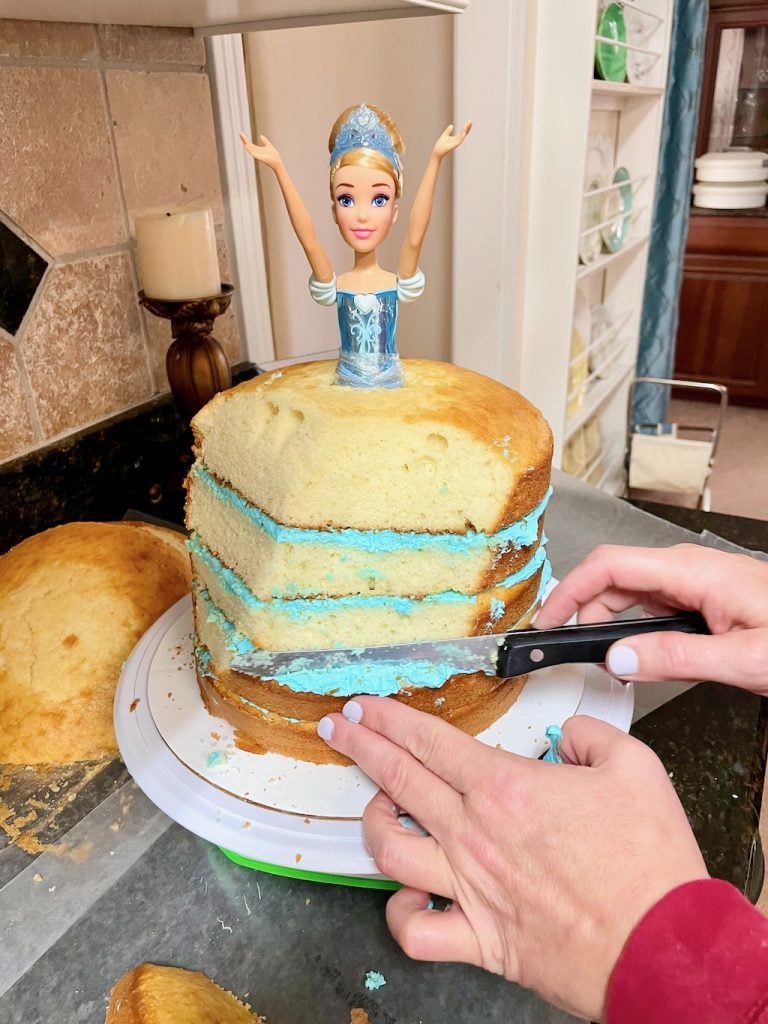
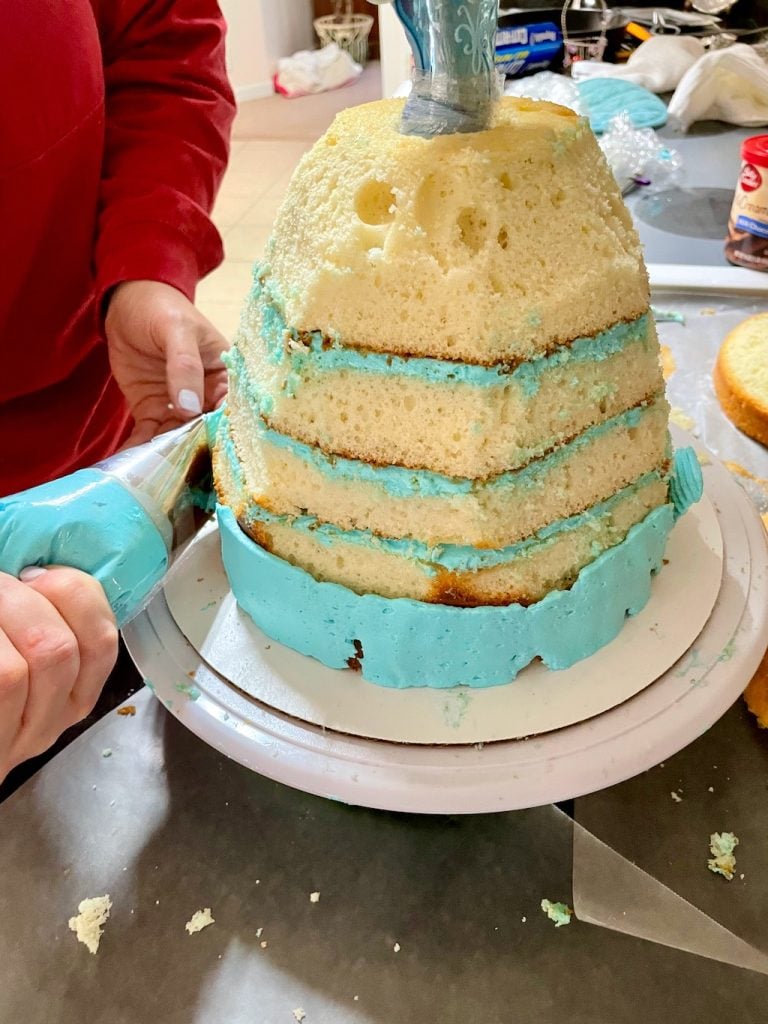
🌟 Step #6 – Shape the Cake Layers into a Bell
After we have all the cake layers stacked up, use a sharp serrated knife to start trimming the cakes into a bell shape.
The bell shape will roughly mimic a long ball gown and will create a great base for our pretty blue frosting.
Angle your knife so that you are cutting off more cake at the top and less as you move toward the bottom.
I like to cut a rough bell shape with hard lines and then go back and smooth out all the edges to make a smooth bell shape.
Take a look at the photo above where the lines are hard.
And in the photo below the hard lines are smoothed out.
Remember, you can always cut more cake off but you can never add cake back so be careful with your shaving and trimming.
🌟 Step #7 – Apply a Crumb Coat then Chill
After you have carved the cake into a rough bell shape, it’s time to start applying the frosting to the outside.
Since we just shaved off some of the cake, we need to clean up our loose crumbs and then apply a crumb coat to seal in any crumbs that continue to come off the cake.
A crumb coat is simply a thin layer of frosting that completely coats the cake and seals in any crumbs.
The crumb coat creates a smooth base for piping your decorative frosting on your cake.
I use a large cake icer tip to apply the frosting in an even layer all around the cake then use an offset spatula to smooth the frosting to completely cover the cake.
After the cake is completely covered with a thin layer of frosting, place the cake into the refrigerator for at least 30 minutes to allow the frosting to set.
🌟 Step #8 – Pipe Blue Rosettes for the Cinderella Dress
Starting at the bottom of the cake, pipe rosettes all around the cake using an open star piping tip.
I like to use the Wilton 1M piping tip for large rosettes like this.
The rosettes should be touching on the sides and on the top and bottom.
If you have small gaps between the rosettes, you can fill them in with some stars using the same piping tip.
If you look closely at the photo below, you can see that I have a good number of stars between my rosettes.
It does not take away from the dress effect to have the stars between the rosettes.
Continue the rosettes all the way up to the top cake.
Be sure to completely cover the plastic wrap with the frosting so that it doesn’t show when your cake is completely frosted.
Handpicked Recipe Favorites From My Kitchen, Just For You!


Frequently Asked Questions
Absolutely! You can bake the cake layers a day in advance and store them in the refrigerator, wrapped tightly in plastic wrap. Just wait to assemble and decorate until you’re ready to serve.
Of course! While vanilla buttercream is a classic choice, feel free to get creative with flavors. Chocolate ganache or fruity cream cheese frosting could add a delightful twist!
Definitely! You can modify this recipe to meet various dietary preferences. Look for gluten-free cake mixes, dairy-free options for the frosting, or vegan substitutes for eggs, like flaxseed meal.
To ensure your rosettes look great for longer, keep the cake in a cool place. If you’re serving it at a warmer event, adding a little extra chill time will help maintain the shape of your decorations!
Cinderella Doll Dress Cake
Ingredients
For the Cake
- 3 boxes (15 ox each) white cake mix
- 3 ¾ cups water, divided
- 9 eggs, divided
- 1 cup vegetable oil, divided
For the Frosting
- 2 recipes Vanilla Buttercream Frosting*
- sky blue gel food coloring
Directions
- Preheat oven to 350 degrees F. Line the bottom of two 8-inch round cake pans with parchment paper and grease well. Set aside.
- In a large bowl, combine 1 box of cake mix with 1 1/4 cups water, 3 whole eggs, and 1/3 cup of vegetable oil. Use a hand mixer to blend ingredients for 2 minutes. Divide batter evenly between two prepared pans.
- Bake cake layers for 29-34 minutes until a toothpick inserted into the center comes out clean.
- Allow cakes to cool for 10 minutes in the pan then remove to a sheet of waxed paper to cool completely.
- Repeat steps 1-4 for the two additional boxes of cake mix. You should have a total of 6 cake layers when done. Allow cake to cool completely.
- Level cake layers using a serrated knife.
- Make vanilla buttercream frosting according to directions. Add several drops of sky blue food coloring until you get the desired shade. Mix well.
- Stack up 5 of the 6 cake layers, adding a layer of sky blue frosting between each one. Wrap the Snow White doll with plastic wrap up to her waist then press it into the middle of the cake layers. The cake should come up slightly below the doll's waist. If it doesn't, remove the doll and add the 6th cake layer then reinsert the doll. Place the cake into the refrigerator to chill for at least 30 minutes.
- Remove the cake from the refrigerator. Starting at the top of the cake, use a serrated knife in a sawing motion to carve the cake into a bell shape. Work toward getting the general shape then you can refine it further from there.
- Add a crumb coat by using a knife or offset spatula to spread a thin layer of blue frosting all over the sides and top of the cake. Return the cake to the refrigerator to chill for at least 30 minutes.
- Add the remaining blue frosting to a piping bag that has been fitted with an open star tip, such as the Wilton 1M tip. Secure with a clip.
- Remove the cake from the refrigerator. Starting at the bottom of the cake, pipe rosettes all the way around the bottom then work your way up the cake. The rosettes should be touching. If there are any gaps, you can fill them by piping stars between the rosettes. As you get to the top of the cake, pipe the rosettes right up to the doll's waist, making sure you completely cover the plastic wrap.
Notes
Equipment
Nutrition Facts
⭐ Leave a comment and rating below — it helps other readers!
👩🍳 Did you make any changes or substitutions?
I’d love to hear how it turned out in your kitchen.
📌 Save this recipe so you can make it again.
📧 Want more easy family dinners like this in your inbox?
Join my free Dinner Idea Box newsletter for simple family dinners every week.


