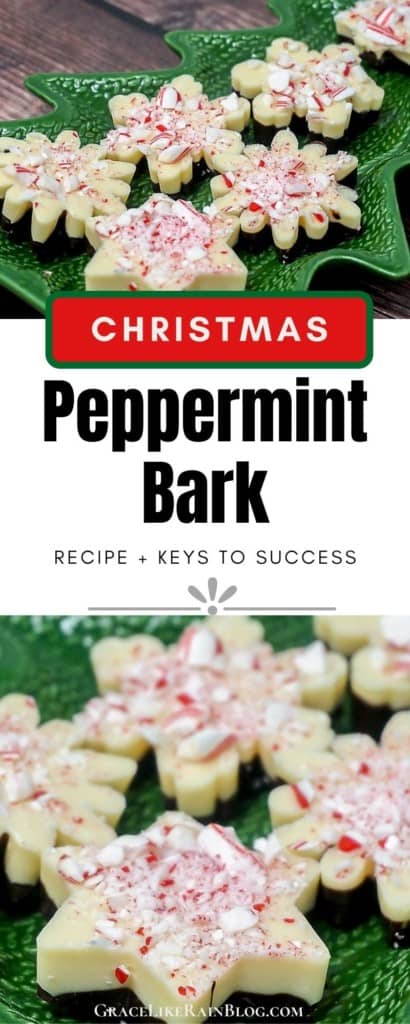
Peppermint Bark with White and Dark Chocolate
Disclosure: This post may contain affiliate links.If you make a purchase through links on our site, we may earn a commission.
Peppermint Bark with White and Dark Chocolate is a fun little treat that we like to make around Christmas time. We love to put these sweets in fun, festive molds. That makes them extra special and perfect for gifting.
Table of contents

Candy canes are one of those things that just scream ‘Christmas’ to me.
Real candy canes are an essential decoration on our Christmas tree every year.
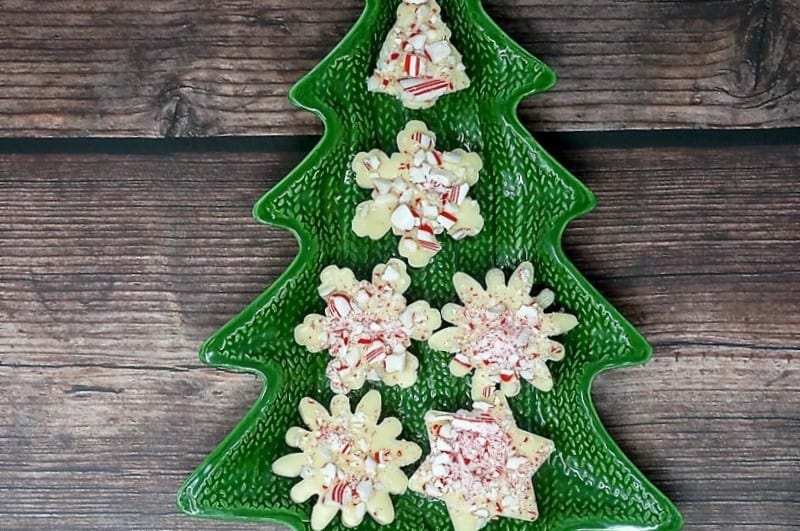
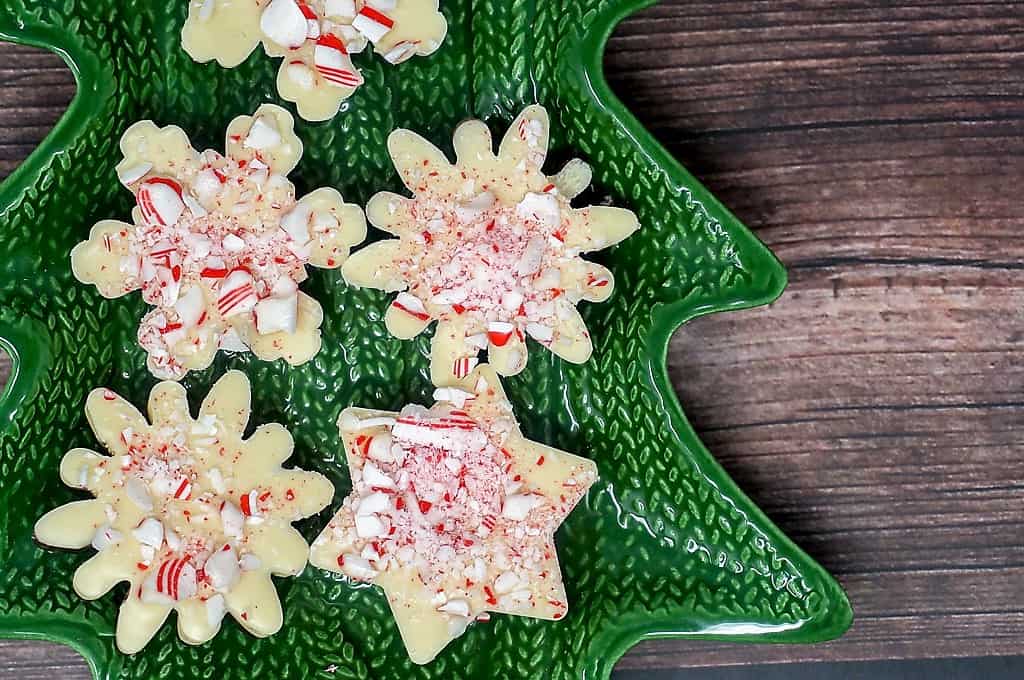
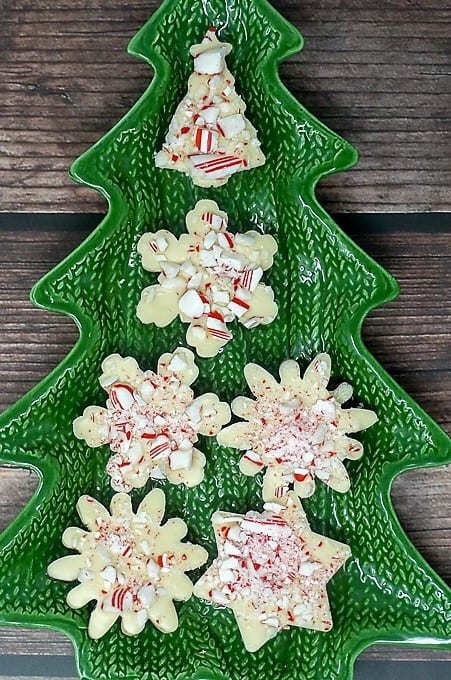
Aren’t these Snowflake Peppermint Bark bites so cute?
Putting the chocolate into a Christmas-themed mold really takes this treat to the next level.
They are perfect for gifting and so easy!
🔑 Key to Success #1 – Use Good Quality Chocolate
For this Peppermint Bark recipe, we’re using good, high-quality baking chocolate bars, not chocolate chips.
You can really taste the difference when you use chocolate bars versus chocolate chips.
The chocolate chips contain stabilizers that allow them to keep their chocolate chip shape when heated.
With the chocolate bars, they don’t contain the same type of stabilizers so they melt a lot better and taste better too.
You can find the chocolate bars in the baking section of your local supermarket.
I’m not talking about the chocolate bars that you find in the candy section.
The chocolate in the candy section has more sugar and less chocolate than the baking chocolate.
First, break up the chocolate bars into pieces or chop them up with a sharp knife.
I pound my chocolate bars with a meat mallet while they are still in their wrapper.
This breaks up the chocolate into small pieces while keeping it contained so that it doesn’t make a mess.
It takes literally 10 seconds to break up all the chocolate. So easy.
🔑 Key to Success #2 – Heat Chocolate Gently
When you are heating both the white and dark chocolate in the microwave, heat it for just 30 seconds then stir it well.
Make sure you do not overheat the chocolate or it could seize up.
You will only heat each type of chocolate for about 1-2 minutes total, in 30-second intervals.
When the chocolate is melted and soft, you can stir it until it is completely smooth.
You don’t have to keep putting it back into the microwave to melt the last few little lumps.
Melting the chocolate should be more about stirring and less about heating.
🔑 Key to Success #3 – Fill Up The Molds
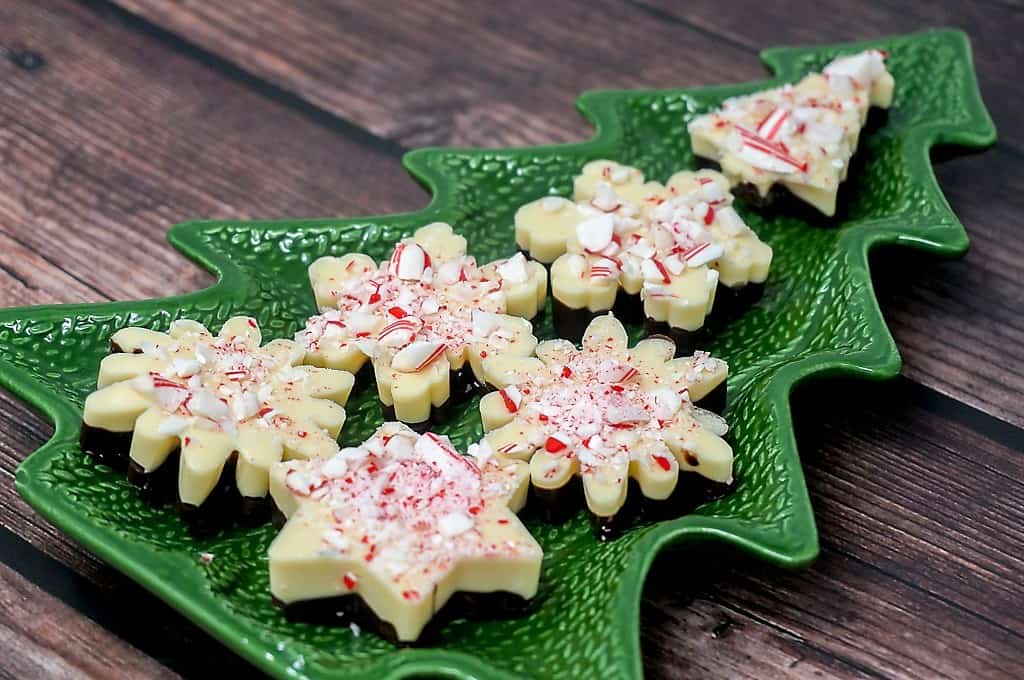
We’re going with a ratio of 1/3 dark chocolate and 2/3 white chocolate.
This is the amount of chocolate we’re melting so we want to make sure that is the same ratio we use when filling up the molds.
We want the dark chocolate to be on the bottom of the snowflake or Christmas shape, so we’re adding it to the mold first.
Use a table spoon to pour a bit of dark chocolate into the bottom of the mold.
Try to avoid getting streaks of dark chocolate up the sides of the mold because those drips will show when you unmold the chocolate.
Pour the spoonful of dark chocolate into the middle of the mold then gently tap the mold on the countertop to make the chocolate spread to the edges.
You can use a toothpick or wooden skewer to help spread the chocolate to the edges and in all the little corners, but we didn’t really feel that was necessary.
Allow the dark chocolate to set until firm.
You can refrigerate it for a few minutes to speed up the process.
After the dark chocolate has set, add in the white chocolate with the added peppermint extract.
The peppermint extract is optional.
Sometimes we use it and sometimes we don’t.
If you don’t add the peppermint extract, you will still get a nice peppermint flavor from the candy canes.
Fill the mold almost to the top with white chocolate.
Again, tap the molds on the countertop to level out the chocolate.
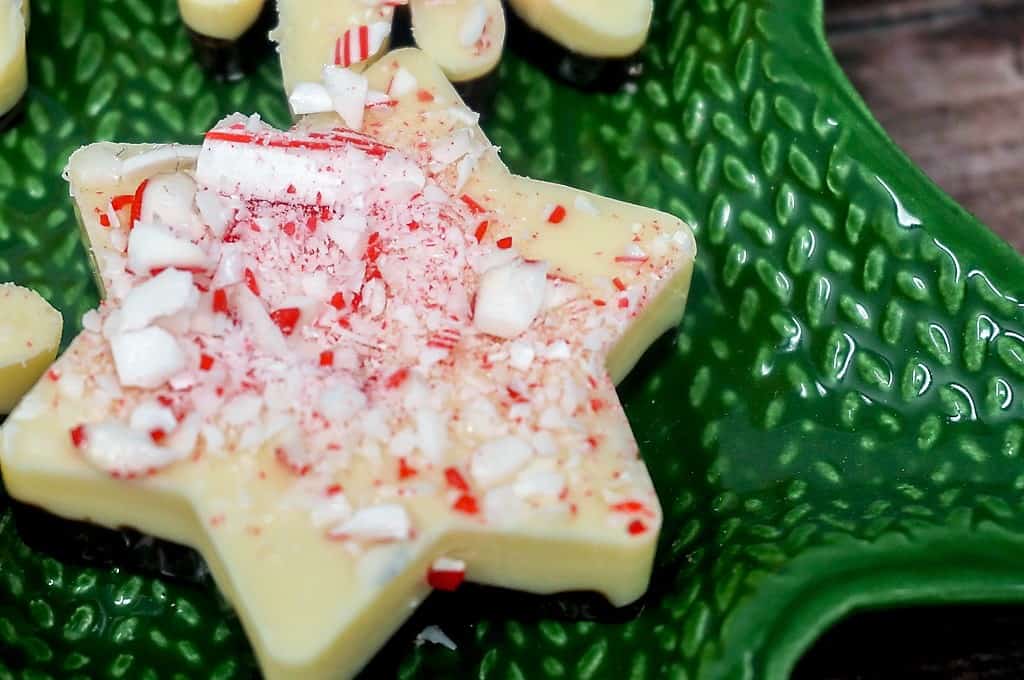
Finally, sprinkle the crushed candy canes on top of the white chocolate while the chocolate is still wet.
Adding the candy canes to the wet chocolate will ensure that your peppermint does not fall off when you unmold the peppermint bark.
😋 Tips for Chocolate Mold and Unmolding
When working with silicone molds, you do not need to grease the mold before adding the chocolate.
In fact, you shouldn’t grease the mold because it will leave a greasy coating on the bottom of your candy.
Simply add the ingredients and then allow the molds to sit until the chocolate is firm.
You can also refrigerate the chocolate to help it set faster, but only leave the chocolate in the refrigerator until it is set.
When you are ready to remove the candy from the mold, simply pull the silicone mold away from the sides of your candy.
Work all the way around your candy until it is loose in its mold cavity.
Next, press the candy mold from the bottom so that the candy pushes up and out of the mold.
With small candy pieces and shallow molds, it’s very easy to release the chocolate from the mold and you should see minimal breakage.
If your mold has a more intricate design, the process is the same. You will just need to be extra gentle when tugging on the silicone mold.
If the chocolate seems to be sticking to the mold, STOP what you are doing and gently wiggle the silicone back and forth until the silicone pulls away from the chocolate.
📌 Get the printable recipe for Peppermint Bark with White and Dark Chocolate
Save this Peppermint Bark recipe with White and Dark Chocolate to your favorite Christmas Candy board or your Holiday Treats board.
Peppermint Bark with White and Dark Chocolate
Ingredients
- 2 pkgs, 4 oz each dark chocolate baking bars
- 3 pkgs, 4 oz each white chocolate baking bars
- ½ tsp peppermint extract, optional
- ¾ cup crushed candy canes
Directions
- Break dark chocolate bars into pieces. In a small microwave-safe bowl, heat chocolate on High power for 30 seconds then stir well. Continue heating in 30-second intervals until chocolate is melted and smooth.
- Place a small amount of dark chocolate into each mold, filling each one about 1/3 full. Tap the mold gently on the countertop to level it out.
- Place molds in the refrigerator for about 15-20 minutes until chocolate is firm.
- Break white chocolate bars into pieces. In a separate bowl, heat the white chocolate in the microwave for 30 seconds then stir well. Continue heating in 30-second intervals until white chocolate is melted and smooth. Stir in peppermint extract, if using.
- Spoon white chocolate into each mold on top of the dark chocolate. Fill the molds nearly to the top. Tap the mold gently on the countertop to level the chocolate.
- Crush up peppermint candy canes. Sprinkle crushed candy canes on top of white chocolate.
- Place molds in the refrigerator for about 20 minutes, until firm.
- Gently remove Peppermint Bark from the molds.
Notes
- Can also layer the chocolate in a 9×13-inch pan then sprinkle crushed candy canes over the top. Break into pieces.
Equipment
Nutrition Facts
⭐ Leave a comment and rating below — it helps other readers!
👩🍳 Did you make any changes or substitutions?
I’d love to hear how it turned out in your kitchen.
📌 Save this recipe so you can make it again.
📧 Want more easy family dinners like this in your inbox?
Join my free Dinner Idea Box newsletter for simple family dinners every week.


