Stained Glass Cookies
Disclosure: This post may contain affiliate links.If you make a purchase through links on our site, we may earn a commission.
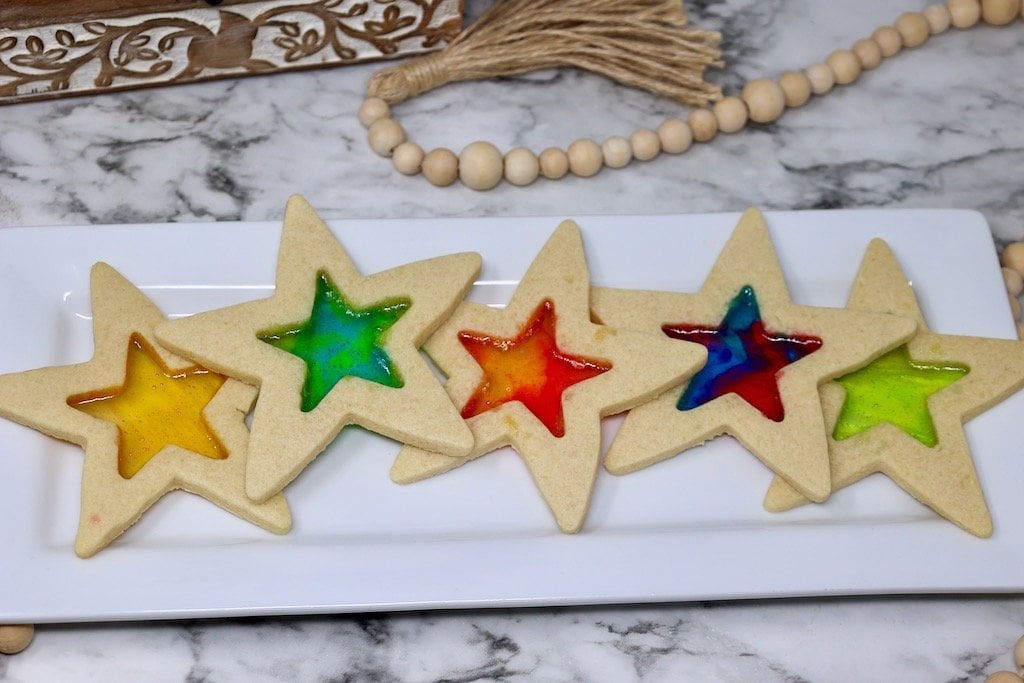
Stained Glass Cookies are a fun twist on traditional sugar cookies, with colorful candy glass adding an extra touch of sparkle to any special occasion. They’re festive, delicious, and perfect for any holiday or special occasion. Let’s take a look at how you can create magical memories with our Stained Glass Window Cookie recipe!
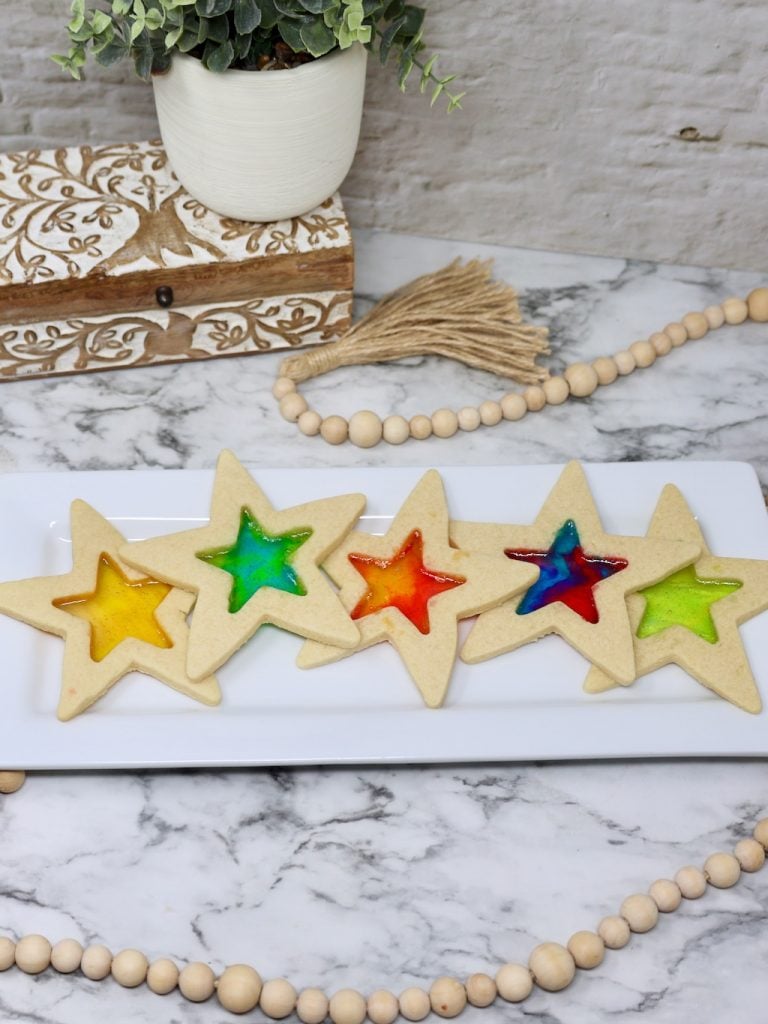
Stained Glass Cookies are perfect for any occasion!
Whether you’re looking for something special to serve over the holidays or just want something unique for weekend gatherings with friends and family, these amazing treats are sure to be a hit.
Plus they’re easy enough that even children can help make them – adding more delightful memories along the way.
So grab your ingredients today and let’s get started making some Stained Glass Cookie magic.

Key to Success #1 – Start With Softened Butter
If you really want your cookies to shine, make sure that the butter is soft and at room temperature before combining it with sugar.
Before you mix up the dough, be sure your butter has reached room temperature.
30 minutes or more on the countertop should bring it right into baking shape – so start prepping now for some delectable homemade goodness!
A stand mixer will help soften up the butter quickly, but don’t worry if all you have is a hand mixe.
Just take some extra time and give that fat plenty of opportunity to reach its full fluffiness potential.
When done correctly this step can transform an ordinary cookie into something truly spectacular.
So start off on the right foot (or whisk!) for heavenly results every time.
Key to Success #2 – Chill the Dough After Rolling
After the cookie dough is mixed up, we’re going to roll the dough out before we pop it in the refrigerator to chill.
Divide the dough into two even sections.
Next, use a rolling pin to roll the dough out on a floured surface.
I like to put a sheet of parchment paper or wax paper out on the counter then sprinkle flour on it.
After the dough is rolled out, slide a cookie sheet under the parchment paper and place the dough intot he refrigerator to chill.
The dough needs to chill for at least an hour before you cut out the cookies.
Using chilled dough will ensure that your cookies hold their shape while baking.
After an hour in the refrigerator, take the dough out and it should be stiff enough to cut shapes.
Using a large cookie cutter, press down into the dough to cut out your desired shape.
Move the cookies to on a baking sheet lined with parchment paper.
While the cookies are on the baking sheet, use the smaller cookie cutter to cut out the middle of the cookie dough.
Don’t move the cookies after the center has been cut out.
They may lose their shape if they’re moved.
Key to Success #3 – Separate Jolly Ranchers by Color
With Stained Glass Cookies, you can let your creativity shine in the kitchen.
Whether you opt for a single-hued design or create an eye-catching look by combining several colors, it’s sure to be candylicious.
Get ready: separate those Jolly Ranchers into their rainbow of hues and get cooking.
I wanted my candy experience to be as colorful and varied as possible.
So I reached for a vibrant mix of classic Jolly Ranchers plus an exotic assortment of tropical-flavored ones.
These two packages guaranteeed me all the color diversity you could ever ask for.
Unwrap the candy and place them into a plastic zip-top baggie.
Next, use a meat mallet or a rolling pin to crush the Jolly Ranchers into bits.
You don’t have to pulverize the candy into powder, but the pieces need to be small enough to fit into. the center of your cookies.

Key to Success #4 – Prebake Cookies Before Adding Candy
Once you cut out the centers of the cookie shapes, it’s time to bake!
Pop the cookie sheet into the oven at 350 degrees F for 4 minutes to prebake the cookies.
We’re prebaking the cookies so that the candy won’t overcook once we add it.
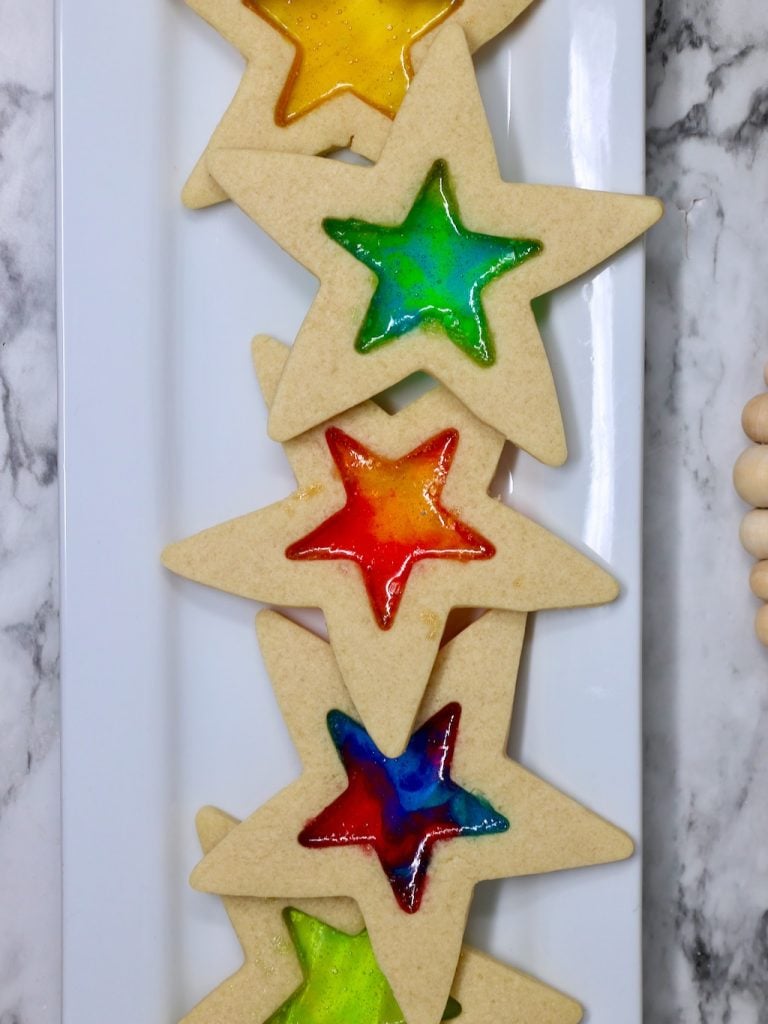
After 4 minutes, remove the cookies from the oven and add one or more colors of crushed Jolly Ranchers into the center of each cookie.
You can use your creativity to combine the candy colors.
If you’r emaking these cookies for a holiday, you can use colors that coordinate with the holiday, such as red and green for Christmas.
Just be mindful of how the colors will look when they’re melted together.
If the combination will not be pretty, it’s best to keep the colors separate.
Add the candy pieces and put the cookies back into the oven for 5 minutes.
The cookies are done when the candy is fully melted and the edges of the cookies are light brown.

Save this Stained Glass Cookies recipe to your favorite Fancy Cookies board or your Christmas Cookie Exchange board.


Stained Glass Cookies
Ingredients
- 1 ½ cups butter, softened
- 1 ½ cups granulated sugar
- 2 eggs
- 2 tsp vanilla extract
- ½ tsp almond extract
- 4 ½ cups all-purpose flour
- 1 tsp baking powder
- ½ tsp salt
- 40 Jolly Rancher candies, crushed
Directions
- In a large mixing bowl, cream together butter and sugar until light and fluffy, about 4-5 minutes. Add eggs, vanilla, and almond extract. Mix for 1-2 minutes to combine.
- Add baking powder, salt, and half the flour. Mix on low speed until just barely combined. Add the other half of the flour and mix on low just until combined. Do not overmix.
- Divide cookie dough in half. Roll each portion of dough out onto a piece of parchment paper to 1/4 inch thickness.
- Place both portions of dough in the refrigerator to chill for 30-60 minutes.
- Crush up Jolly Ranchers by color, keeping the colors separated.
- Preheat oven to 350 degrees F. Line baking sheets with parchment paper. You will need two cookie cutters – one that is about 1 1/2 inches and one that is about 3 1/2 inches.
- One at a time, remove the dough from the refrigerator and use the larger cookie cutters to cut shapes from the dough.
- Place large cookie shapes on prepared baking sheets. Use the smaller cookie cutter to cut out the center of each cookie. The smaller shape can be rerolled with the remaining dough. Continue cutting large shapes until all dough is used.
- Bake for 4 minutes then remove from the oven and add one or more complimentary colors of crushed Jolly Ranchers in the center of the cookie. Return the baking sheet to the oven and cook for another 5 minutes until the cookies are very lightly browned around the edges and the candy is completely melted. Do not overbake.
- Allow cookies to cool for 5 minutes before removing them from the pan.
Notes
Equipment
Nutrition Facts
⭐ Leave a comment and rating below — it helps other readers!
👩🍳 Did you make any changes or substitutions?
I’d love to hear how it turned out in your kitchen.
📌 Save this recipe so you can make it again.
📧 Want more easy family dinners like this in your inbox?
Join my free Dinner Idea Box newsletter for simple family dinners every week.
Handpicked Recipe Favorites From My Kitchen, Just For You!
Sweet Potato Casserole with Pecan Topping and Marshmallows


